Welcome to Lumider Lighting Co., Limited
一、安装前注意事项说明:
1. 使用前请祥细阅读本说明书。
2. 非专业技术人员,请不要擅自维修或改装本产品。
3. 安装之前请先关闭电源,以免操作不当触电。
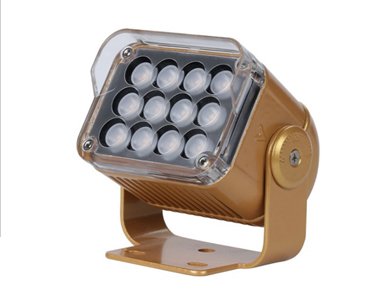
4. 安装之前请注意检查洗墙灯上所标识的电压与即将连接的输入电压是否一致,以免损坏LED洗墙灯。
5. 为保证产品的使用寿命,请不要在酸雾气浓的地方使用。
6. 在安装和运输过程中注意防震。
7. 安装前确保安装位置可以承受10倍于该产品的重量,安装于无震动无摇摆,无火灾隐患的平坦地方;
8. 如灯具出现故障,请将灯具集中放置于一个地方,然后一起寄回本公司检测维修;
9. 如发现灯体电线破损,请立即断电停止使用。
二、安装说明:
1. 首先用螺丝将灯具固定牢固;
2. 将灯具与电源线连接牢固,不用的线头用防水胶带包好;
3. 在安装接线时一个分支电源最多串接8-10台洗墙灯;或50米后另接电源线。
4. 安装完成后请先对安装线路进行检查,确认安装无误,无电气短路后,接通相应的控制电源;
5. 如果在安装中出现问题,请咨询本公司技术人员;
DMX512外控LED洗墙灯安装示意图:
注意:该图以洗墙灯工作电压为AC220V为例,如洗墙灯电压为AC24V,则接入电压必须为AC24V

单色/内控LED洗墙灯安装示意图:
注意:该图以洗墙灯工作电压为AC220V为例,如洗墙灯电压为AC24V,则接入电压必须为AC24V


 Scan to follow Lumider Wechat
 Scan to open the mobile website
 中文
中文